How to View Timeline Individual Data

- Click the kebab menu (three dots) on the top-right corner of a Timeline Data box.
- Select View from the menu.

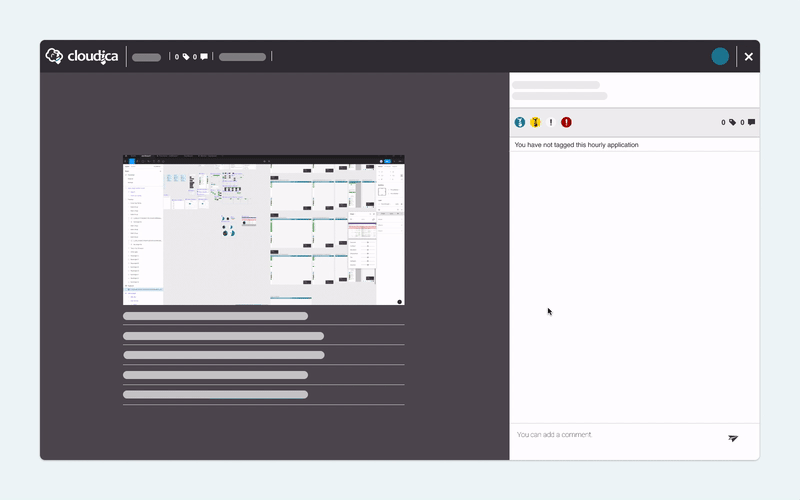
- Application Name The app or website being tracked.
- Tag Count The number of times the data has been tagged.
- Comment Count The number of comments posted.
- Date When the activity occurred.
- User Initials A snapshot or initials of the user.
- Exit Button Used to go back to the main Timeline view.
- Content The activity details, including screenshots.
- Frequency How often the application was opened.
- Timestamp The time and duration of the activity.
- Tag Icons Tools for categorizing the data.
- Comment Text Box Allows you to leave comments.

- Scroll to the bottom of the right panel.
- Click inside the text box.
- Type your comment.
- Click Send or press Enter.
- On the right panel, click one of the Tag Icons (Productive, Excellent, Irrelevant, or Violation).
- The system will apply the tag and notify the user.