How to Manage and Track Team Progress with the Task Module
- Remote Users:
- Create, track, and manage personal tasks to organize individual daily deliverables.
- Managers:
- Create and assign new tasks directly to team members.
- View, edit, and update the completion status of all tasks assigned to your team.
- Modify tasks assigned to your team by peer managers to ensure project continuity.
- Delete tasks that you personally created or assigned.
- Account Owners & Administrators:
- Create, view, edit, and delete tasks for any user under your supervisory care to help maintain overall departmental alignment.
- Click your avatar in the upper-right corner of the web dashboard.
- Click Manage Tasks on the User Menu.
- On the Tasks Report table, click on the name of the user you want to assign the task to. (Alternatively, use the main top Search bar to quickly find a specific user).

- From the Virtual Workspace module, locate the user data box of the team member you want to assign a task to. You can scroll through the layout or use the top Search function to pinpoint a specific user.
- Click the kebab menu (three vertical dots icon) located on the upper-right corner of that user’s data box.
- From the action menu that opens, click View Tasks.

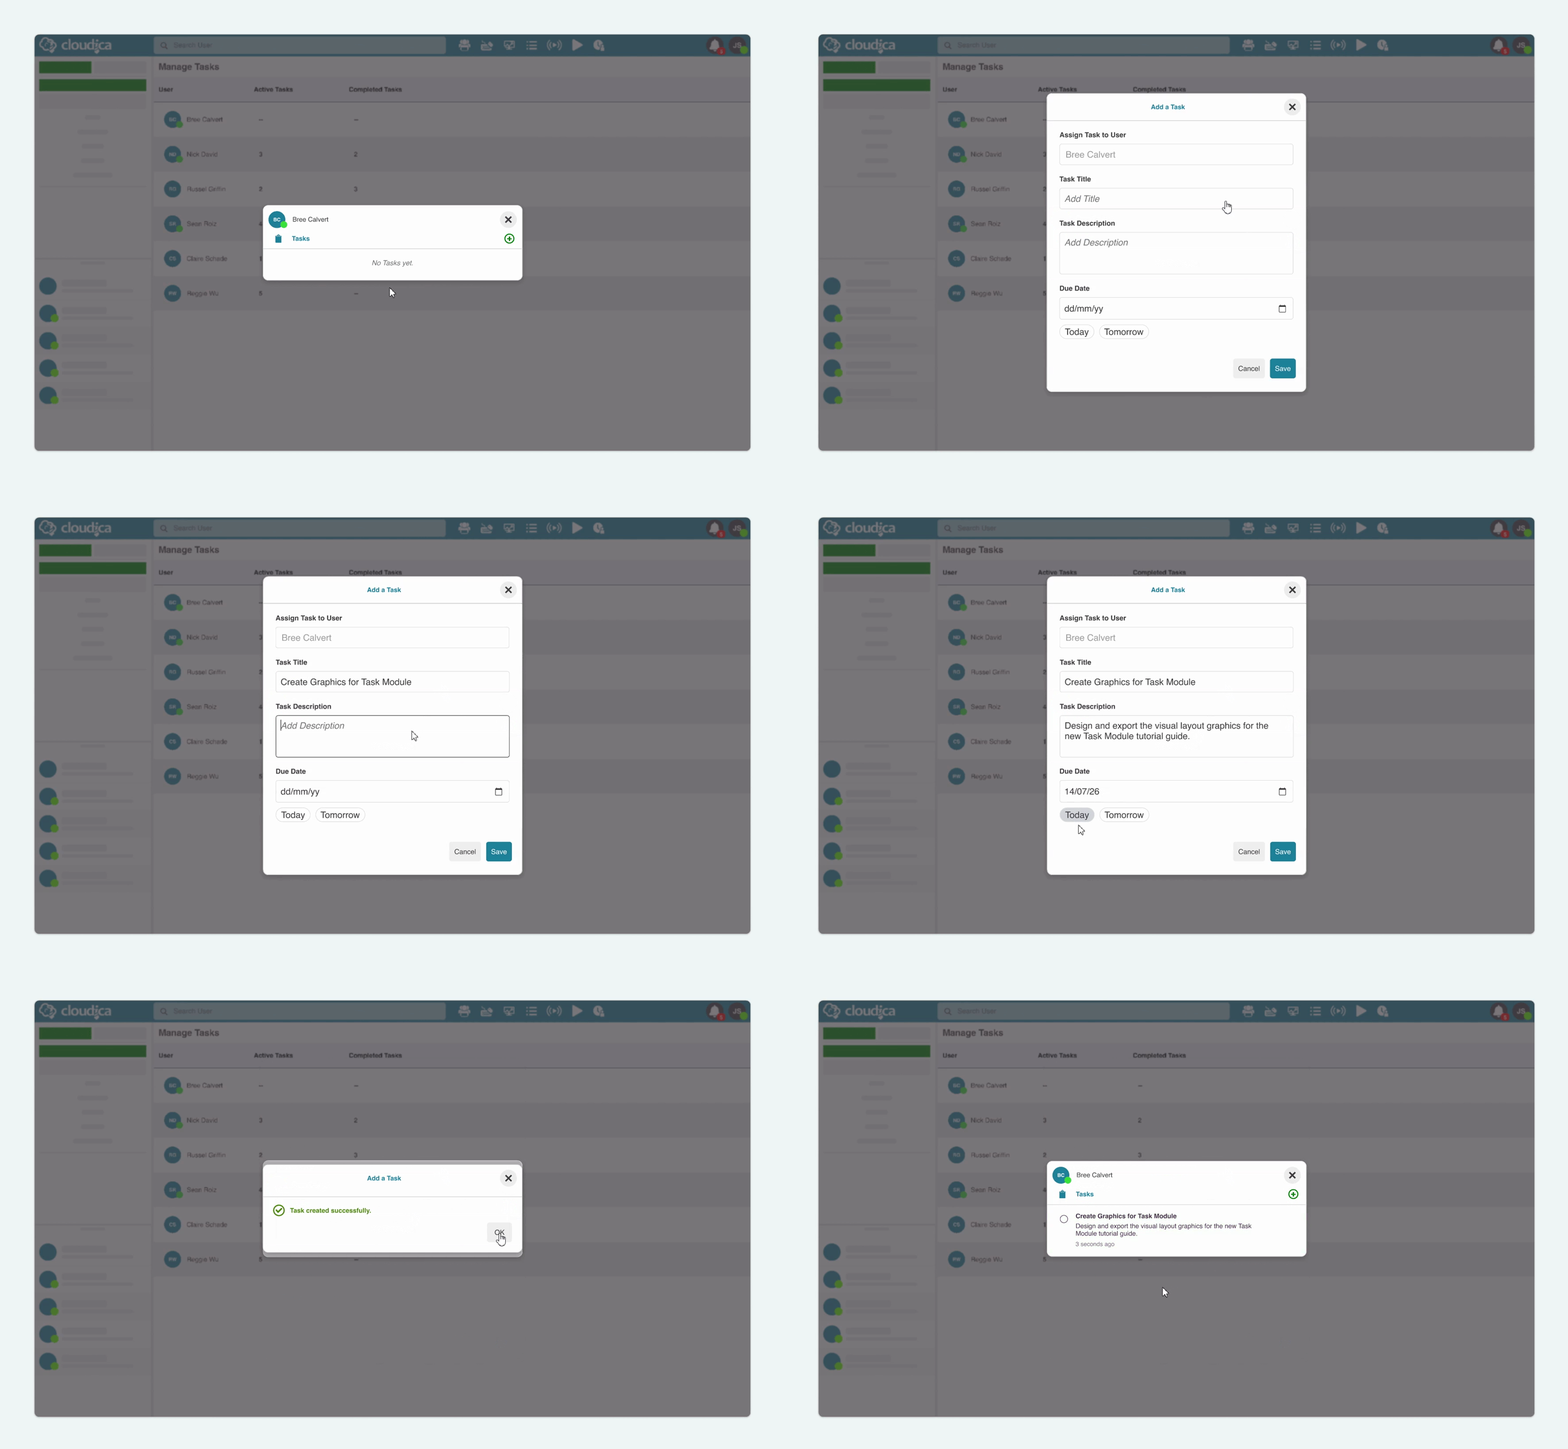
- Click the green plus icon (+) on the right side of the Tasks modal to create a new task entry.
- On the task details view, enter the Task Title, write a Task Description, and choose a Due Date (if applicable).
- Due dates can be set quickly for Today or Tomorrow by clicking the quick-buttons, or by clicking the calendar icon to select a specific future date. Ongoing, continuous, or recurring tasks can be saved without setting a due date.
- Click Save to publish.
- Click on a user to open his/her task list.
- Select the specific task you wish to modify.
- Hover over the task within the pop-up modal and click the Edit (pencil) icon.
- Update the title, description, or due date as needed, then click Save.

- Click on a user to open his/her task list.
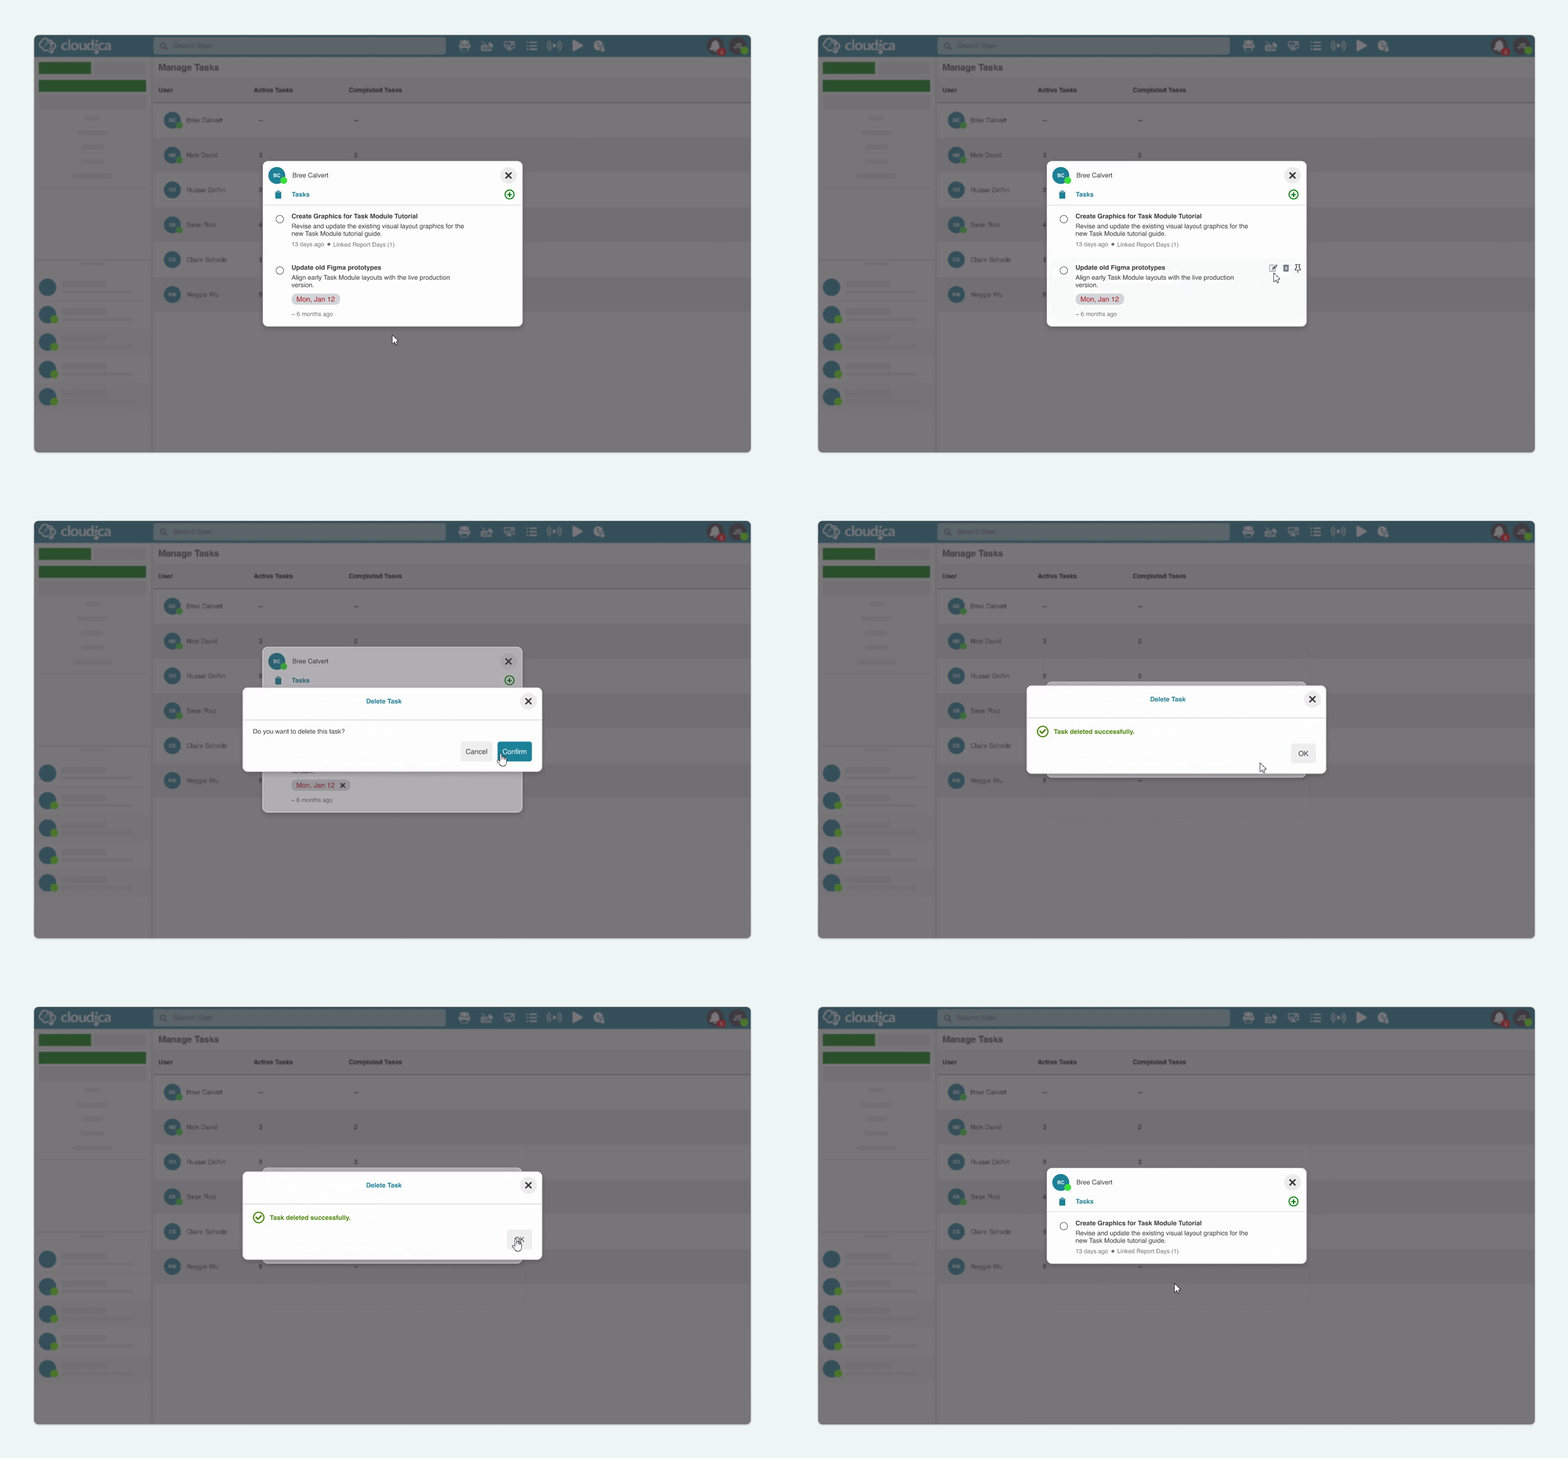
- Select the specific task you wish to remove.
- Hover over the entry within the pop-up modal and click the Delete (trash can) icon.
- Click Confirm on the security pop-up to permanently delete the task, or click Cancel to abort.
- Click on a user to open their task list.
- Hover over the task within the pop-up modal and click the Pin icon on the right side.
- If another task is already pinned, click Confirm on the pop-up prompt to switch the pin to the new task.

- Click on a user to open his/her task list.
- Hover over the task you want to mark as Complete and click the blank circle on the far left side.
- Clicking the circle places a checkmark inside it, instantly moving the task out of the Active List and into the Completed section.

- Click on a user to open his/her task list.
- Locate the Completed section at the bottom of the pop-up modal and click the right-facing chevron arrow (toggle icon) next to the header text to expand the hidden view.
- The section will expand downward to reveal all finished tasks along with the date they were completed.
- Completed Tasks cannot be edited, but they may be deleted by the supervisor or manager overseeing that user's workflow to maintain accurate departmental records.

- Click on the user's name to open their task list.
- Locate the Completed section at the bottom of the pop-up modal and click the chevron arrow to expand the view.
- Hover over the specific task you wish to reactivate and click the checkmark circle on the left side.
- The task will instantly clear from the Completed section and return to the team member's Active Tasks list, allowing them to resume work, edit details, or pin it as a priority normally.
