How to Request Work Log Additions
The Work Logs feature allows employees to record reference logs for situations where they arrive late or continue working offline (e.g., during an app crash).
Important Distinction: Work Logs are for reference only. They provide documentation for your activity, but do not automatically affect addendum computations or final timesheet totals.
How to Add a New Work Log
1. Access your Cloudica™ dashboard.
2. Click Worked Hours on the left side of the dashboard.
3. Choose the View Work Logs option from the menu.
4. Click the Add Logs button.
5. Enter your Time In and Time Out hours.
6. Click the Submit button.
 Requesting for a Previous Date: If you need to file a Work Log for a past date, first use the Date Picker at the top of your dashboard to select the correct date. Once the dashboard updates, proceed with the steps above.
Essential Rules & Requirements
To ensure accuracy, the system enforces the following rules for Work Logs:
Requesting for a Previous Date: If you need to file a Work Log for a past date, first use the Date Picker at the top of your dashboard to select the correct date. Once the dashboard updates, proceed with the steps above.
Essential Rules & Requirements
To ensure accuracy, the system enforces the following rules for Work Logs:
- Prerequisites: To enable the Add Log button, you must have an approved Addendum Request.
- Active Sessions: If making a request for the current date, the Add Logs button will be disabled if you are still online in the Cloudica™ desktop app.
- No Overlaps: A Work Log cannot overlap with your recorded app Time In/Out.
- Specific Placement: Work logs must either:
- End exactly at your app "Time In" (for late arrivals).
- Start exactly at your app "Time Out" (for offline work/app crashes).
- Duplicate Logs: Work logs must not overlap with existing pending or approved logs.
Know more about how to request an Addendum.
Managing Your Requests
Once submitted, your request will remain Pending until reviewed. You will receive a dashboard notification once a Manager or Account Owner has approved or declined it.
How to Edit or Cancel a Request
If a request is still pending, you can modify it:
- Go to Worked Hours > View Work Logs.
- Hover over the specific log request until the Kebab Menu (three dots) appears.
- Select Edit to update the time, or Cancel Request to delete it.
 How to View Your History
- Via User Menu: Click the User Menu, select My Addendums, and click the My Work Log Requests tab.
- Via Timesheet Menu: Click Worked Hours > View Work Logs > My Requests.
The Work Logs Request Table
The request table tracks the following details: Added By, Work Date, Time In, Time Out, and Status.
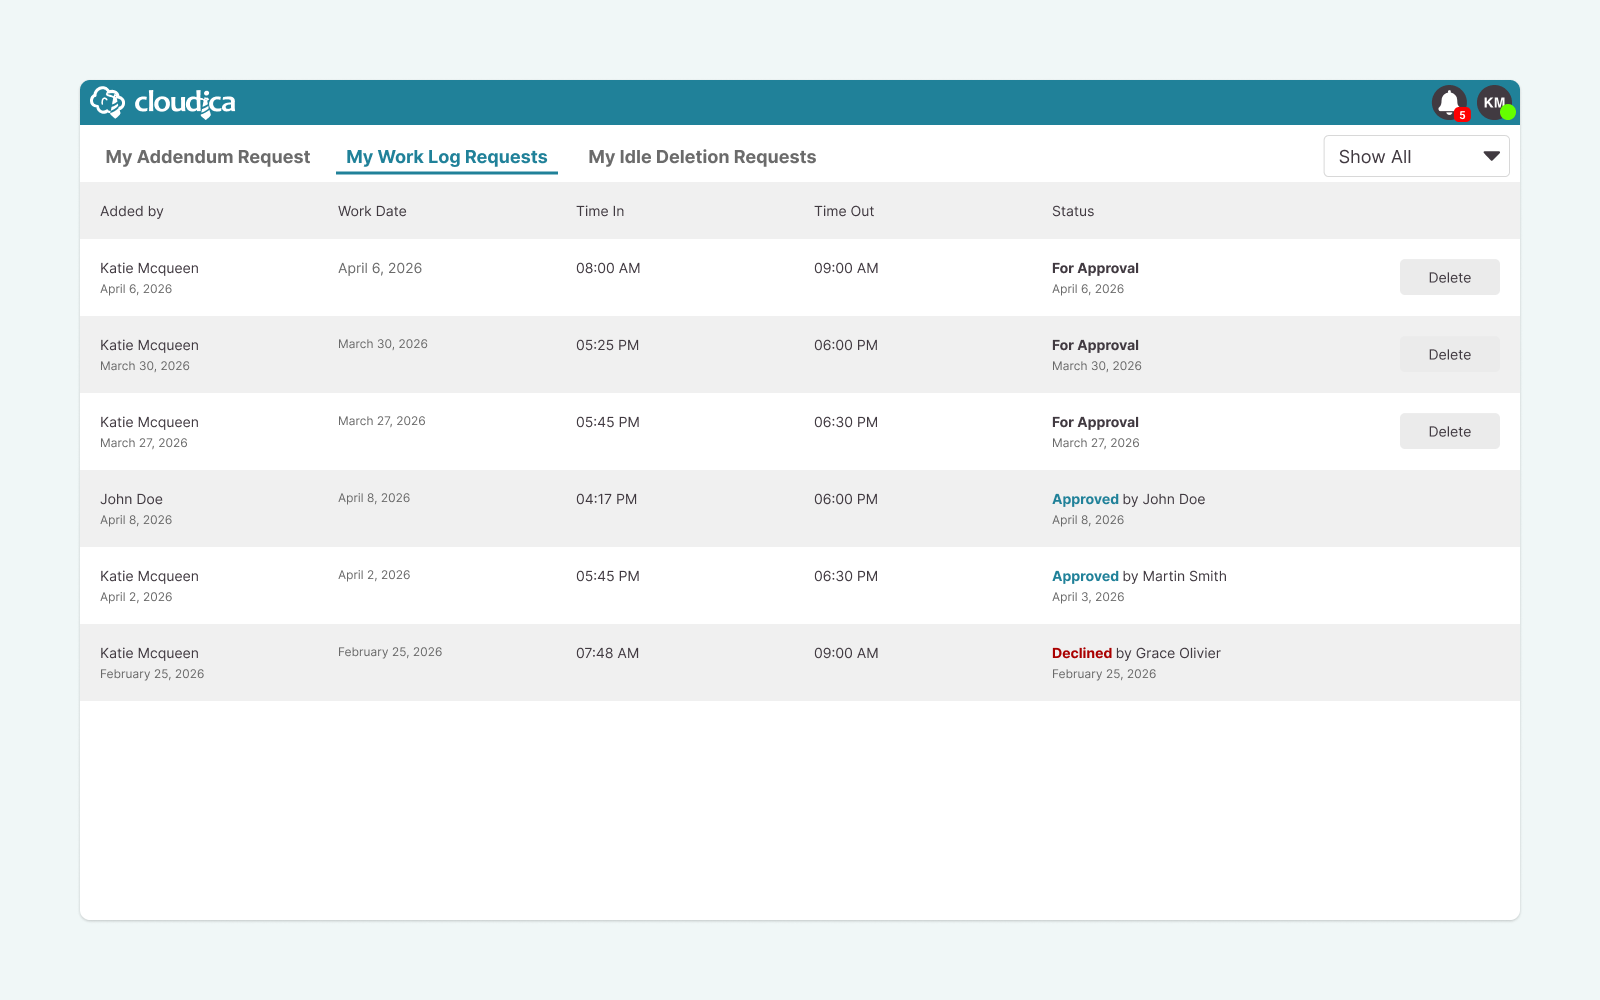
- View Details: Click any row in the table to open a pop-up with full details.
- Delete: Use the delete button to remove "Pending" requests.
- Filter: Use the filter button on the right to sort logs by status.
Request Status Types
- For Approval
Pending review by a Manager or Account Owner.
- Approved
The request has been accepted for reference.
- Declined
The request has been rejected.
Why Use Work Logs?
Work Logs provide a transparent record of your professional activity during technical disruptions or late starts. By keeping these logs updated, you ensure your manager has the full context of your workday, supporting better communication and accountability.
Copyright © 2025 Cloudica LLC